
Quality Assurance

Gloved hand holding lens under inspection.
Blue liquid sample under compression test.

Optical Quality

Notch Optics maintains a rigorous Quality Assurance (QA) process to ensure that all products meet specified requirements. Our commitment to quality includes utilizing the latest testing and inspection methods to instill confidence in meeting stringent quality standards.

Key Quality Practices

  • Initial Inspection: Interferometry measurements and roughness assessments are conducted prior to coating, unless otherwise specified.
  • Certificate of Conformance: Provided with every order to certify compliance with customer requirements.
  • Inspection Reports: Available upon request to detail quality inspection results.
  • Sampling Standards: Conformance is measured using AQL 1.0 Level 2, based on ISO 2859-1 standards.
  • Commercial Quality Tolerances: Unspecified tolerances are interpreted as Commercial Quality, as defined in our Standard Tolerances.

Customer-Furnished Materials (CFM)

  • CFM undergoes inspection upon receipt for damage and surface quality concerns. Any issues identified are promptly communicated to the customer. Notch Optics assumes no liability for CFM defects not related to value-added processes.

Environmental Compliance

  • RoHS, REACH, and Prop 65: Notch Optics adheres to global environmental regulations, including EU RoHS 3 Directive 2015/863, REACH Regulation (EC) No 1907/2006, and California’s Proposition 65, ensuring products meet stringent substance restrictions and environmental standards.

Military Specifications

  • Our facilities are equipped to comply with various military specifications (Mil-Specs), including MIL-STD-810B, MIL-C-675C, MIL-C-48497A, MIL-F-48616, MIL-PRF-13830B, and MIL-M-13508C, ensuring optical components meet military-grade durability and performance requirements.

Standard Tolerances

  • Detailed specifications for flat BK-7, fused silica, silica materials, flat IR materials, and diamond point turning ensure precision and reliability across different optical grades and applications.

Note: Specifications are subject to variations based on size, aspect ratio, and other factors requiring exceptions or deviations from standard tolerances.

Our customers appreciate our strong focus on quality, dedication to customer satisfaction, and rigorous process development aimed at prevention. Each division at Notch Optics continually evaluates key aspects of our processes and procedures to drive ongoing improvement initiatives. Our objective is to utilize Statistical Engineering tools for effective problem-solving, complemented by extensive in-house training and stringent procedures, making Notch Optics the preferred choice for precision glass optics solutions.

Notch Optics' Quality Management System is built on the foundation of the ISO 9001:2015 International Quality Standard. We strive for excellence through various Statistical Process Control (SPC) methods, including control charts, continuous improvement, and the design of experiments, alongside the implementation of 5S methodologies.

Our divisions are equipped to meet numerous industry quality standards and customer-specific requirements, encompassing ANSI, ASME, ASTM, NCSL, ISO, and MIL, such as MIL-PRF-13830B, DIS, JAN, and SAE.

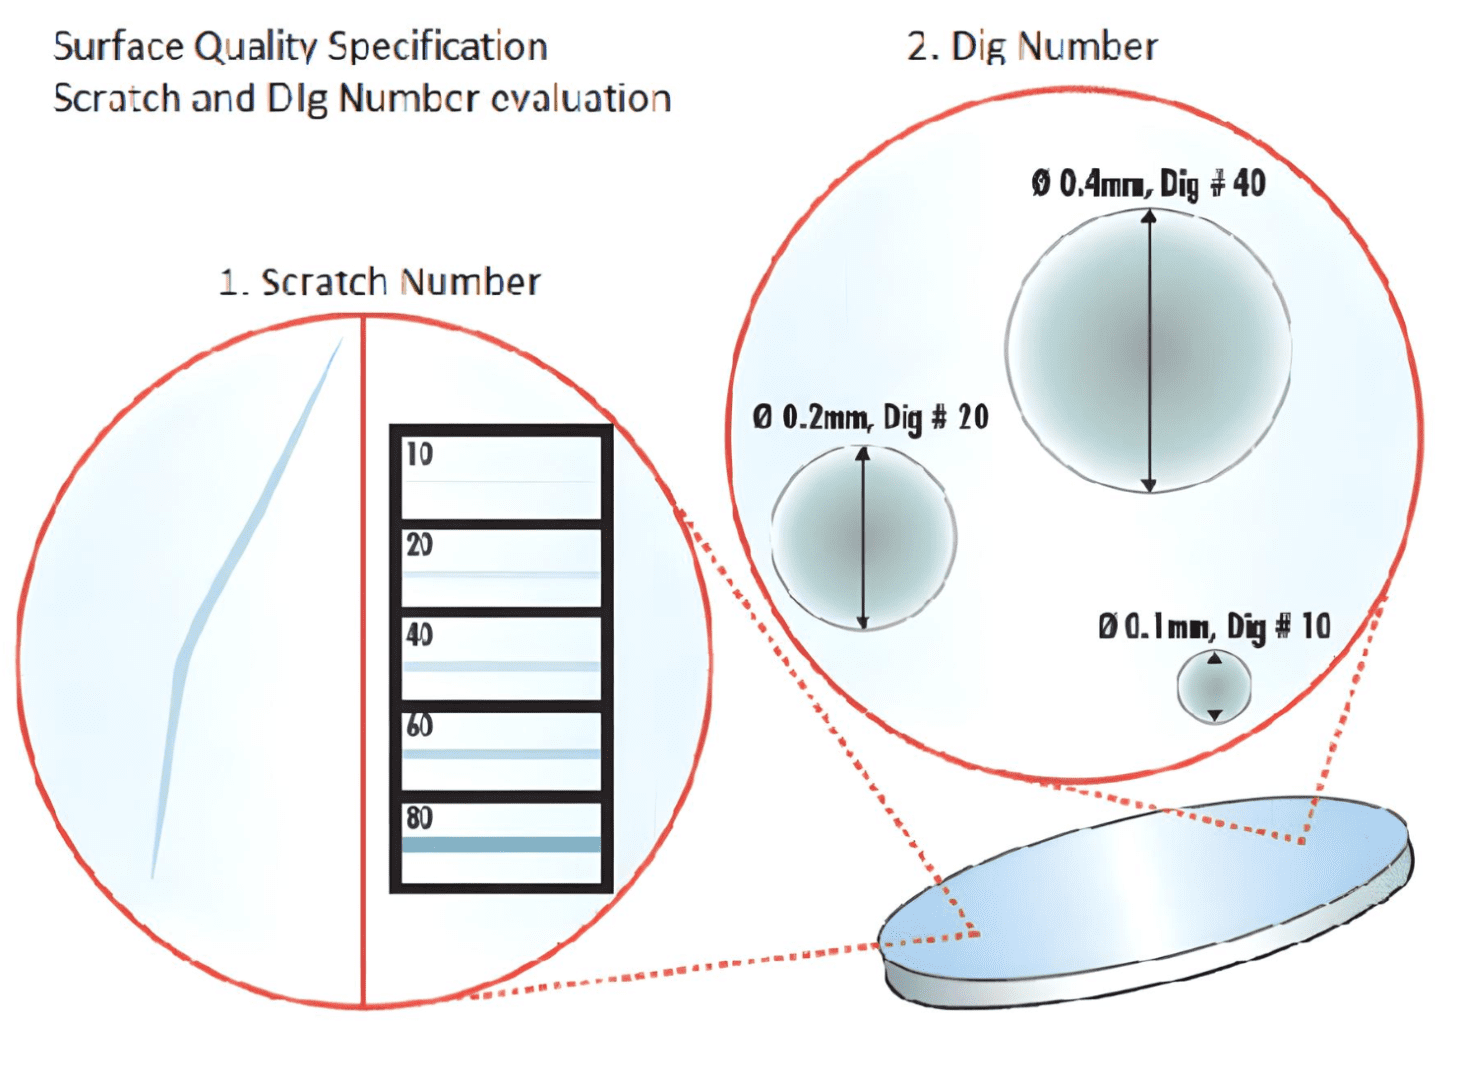
Specification Standards: Surface Quality can adhere to MIL-PRF-13830B and other applicable standards, tailored to specific application needs. This specification defines polish state, scratch resistance, and visual clarity.

Ensuring consistent results demands trained quality inspectors operating under standardized lighting conditions, overseen by Notch Optics' Quality Engineering team.

Definitions

  • Scratch: Linear surface tearing, specified by width according to defined standards.
  • Dig: Small pit or crater, specified by diameter in hundredths of a millimeter.
  • Coating Defects: Scratches and digs within allowable limits specified in component drawings or procurement documents, distinct from substrate requirements.
  • Glass Irregularities: Inherent substrate features like bubbles or internal imperfections are managed through specified quality levels as per project requirements.
Here's an alt tag for the image: Gloved hands holding a reflective polygon.
optical surface quality standard